A national brand rollout is one of the most complex projects a marketing or operations team will manage. It touches every department design, procurement, property, legal, IT, facilities and it demands coordination across dozens or hundreds of individual locations, each with their own access constraints, landlord requirements, trading hours and physical quirks. When it works, the result is a unified brand experience delivered simultaneously across an entire estate. When it does not, the result is missed deadlines, inconsistent execution and a trail of costly remedial work.
We deliver retail and multi-site rollout programmes for national brands, retail chains and corporate estates across the UK. This checklist distils what we have learned from hundreds of multi-site programmes into ten practical steps that keep rollouts on time, on budget and on brand.
Key takeaways
- Successful rollouts are won or lost in the planning phase rushing to production before site data is complete is the single biggest cause of programme delays
- Site surveys must be standardised and comprehensive; the data collected drives every downstream decision from production specifications to installation scheduling
- Material specifications should be confirmed across all substrate types before volume production begins, particularly where brand colours must match across vinyl, fabric, signage and printed collateral
- Kitting materials per site before dispatch eliminates confusion on the ground and reduces installation errors by up to 80%
- A single programme manager who controls production, logistics and installation creates accountability and prevents the communication gaps that derail multi-supplier rollouts
- Post-installation sign-off with photographic evidence protects both the brand and the contractor
Step 1: Define the Scope and Success Criteria
Before anything else, establish exactly what the rollout includes. This sounds obvious, but scope creep is responsible for more rollout budget overruns than any other factor. Define which locations are in scope, what elements are being installed (graphics, signage, POS, fixtures, digital screens), what the completion deadline is, and what “done” looks like at each site.
Document this in a programme brief that every stakeholder signs off on. The brief should include a definitive site list with addresses and contact details, a complete schedule of elements per site, brand guidelines with approved artwork files, the target completion date and any phasing requirements, budget parameters, and escalation procedures for when things go wrong because on a programme of any scale, something always will.

Step 2: Conduct Standardised Site Surveys
Every site in a multi-location programme is different. Wall substrates vary, ceiling heights differ, window dimensions change, electrical provisions are inconsistent, and access restrictions range from “open 24/7” to “two-hour window on alternate Tuesdays.” The site survey captures the data that turns a generic brand scheme into a site-specific installation plan.
Use a standardised survey template so that every location provides the same data in the same format. Key data points include: precise wall, window and fascia dimensions (millimetre accuracy); substrate types for every surface receiving graphics; existing signage and graphics requiring removal; electrical provision locations and capacity; access constraints (loading bay availability, lift dimensions, trading hour restrictions); landlord or centre management contact details and approval requirements; and photographic documentation of every installation area.
For programmes covering 50+ locations, it is worth investing in a digital survey platform that allows field teams to submit standardised data with GPS-tagged photographs directly into a central database. This eliminates the transcription errors that inevitably occur when survey data is transferred from handwritten forms to spreadsheets.
Step 3: Finalise Artwork and Material Specifications
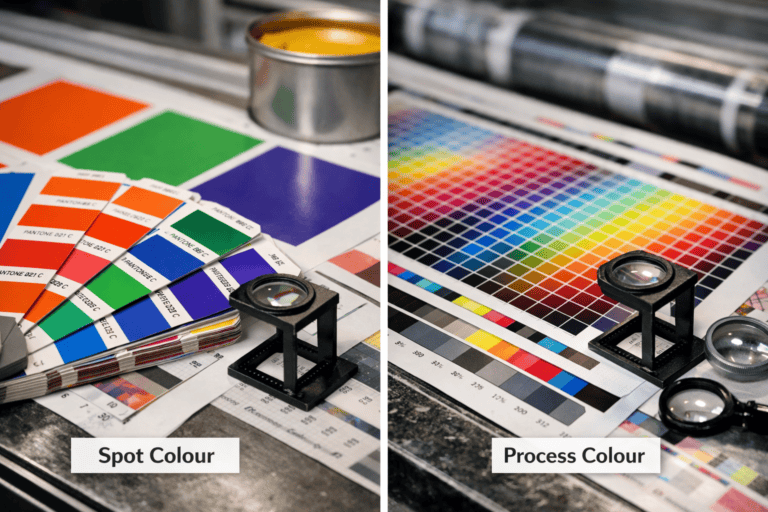
Artwork should be production-ready before the site survey phase completes, so that production can begin immediately once site-specific dimensions are confirmed. “Production-ready” means vector artwork at correct colour specifications (CMYK plus any spot colours), with bleed, crop marks and layered files that allow elements to be scaled to individual site dimensions without redesign.
Material specifications must be confirmed at this stage, not during production. If the programme involves large format graphics production across multiple substrate types vinyl wall graphics, fabric banners, foamex panels, window manifestations each substrate needs its own colour profile to ensure brand colour consistency. A Pantone 281 C printed on white self-adhesive vinyl will appear different on polyester fabric or foamex board unless the colour profiles are adjusted for each material.
This is where colour management and profiling makes a measurable difference. On a 200-site rollout, even small colour discrepancies between substrates become visible and undermine the brand consistency the programme is designed to achieve.
Step 4: Create Site-Specific Production Packs
Generic production runs where every site receives the same items rarely work in practice. Most multi-site programmes involve some degree of site-specific variation different window widths, different fascia lengths, different internal layout configurations. The production plan must account for these variations by generating site-specific artwork and cut specifications from the survey data.
Each site should have a documented production pack listing every item being produced for that location, with dimensions, substrate, quantity and a visual reference. This production pack becomes the quality control document during manufacturing and the pick list during kitting.
Step 5: Manufacture with Batch Control
For multi-site programmes, batch consistency matters as much as individual print quality. If the first fifty sites receive graphics printed in one batch and the next fifty receive graphics printed two weeks later, colour drift between batches will be visible when sites are compared side by side.
We control this through standardised ICC profiles, daily calibration checks, and proofing against a master reference for every production batch. For colour-critical programmes, we retain a printed reference strip from each batch so that any reported colour discrepancy can be traced back to the specific production run.
Step 6: Kit Materials Per Site
This is the step that separates professional rollout programmes from chaotic ones. Instead of shipping bulk materials to a regional hub and expecting on-site teams to sort through pallets of mixed graphics, every site receives a pre-assembled kit containing exactly the items specified for that location labelled, packed in installation sequence, and accompanied by a site-specific installation guide.
Warehousing and fulfilment is built into our rollout service. We kit materials per site in our warehouse, label each box with the store name, address and contents, include printed installation instructions with dimensioned diagrams, and pack items in the order they will be installed large wall graphics on the outside, small finishing elements on the inside.
The impact on installation quality is significant. Kitted programmes typically report 80% fewer on-site queries and almost zero instances of wrong materials arriving at the wrong location.
Step 7: Schedule and Coordinate Installation
Installation scheduling on a multi-site programme is a logistics exercise as much as a construction one. Each site has its own access window, its own landlord approval timeline, and its own operational constraints. The installation schedule must account for geographical efficiency (minimising travel time between sites), site readiness (confirmation that preparatory works like de-branding or surface preparation are complete), and resource availability (matching the right installation team to the right job type).
For programmes involving signage manufacturing and installation, the scheduling complexity increases because signage installations often require cherry picker access, electrical connection, and building management approval all of which need to be arranged in advance.
We manage installation scheduling centrally, with a live programme tracker that shows the status of every site: surveyed, in production, kitted, dispatched, installed, signed off. This gives the client a single real-time view of programme progress without having to chase multiple suppliers.
Step 8: Install with Documented Quality Standards
Installation quality is only as good as the standards it is measured against. Before installation begins, agree a quality standard document with photographic references showing what “good” looks like correct alignment, consistent spacing, bubble-free vinyl application, proper edge sealing, clean finishing around obstacles. Every installer on the programme should receive this document and confirm they understand the standard expected.
Step 9: Complete Post-Installation Sign-Off
Every site installation should be photographically documented and formally signed off. The sign-off record should include before and after photographs of every installation area, confirmation that all specified items have been installed, a note of any defects or outstanding items requiring return visit, and sign-off by the site contact or store manager.
This documentation serves multiple purposes: it provides the client with a visual record of the completed programme, it protects the installer against retrospective claims of damage or incomplete work, and it creates a baseline reference for future maintenance or refresh programmes.
Step 10: Plan for Ongoing Maintenance and Refresh
A rollout is not a one-off event. Graphics get damaged, signage requires lamp replacements, new stores open, existing stores are refurbished, and seasonal campaigns introduce temporary elements that need installing and removing on a regular cycle. The best rollout programmes build a maintenance and refresh plan from the outset.
This includes holding buffer stock of key items in the warehouse for rapid replacement, maintaining a master file set with site-specific dimensions for reprint orders, scheduling periodic condition surveys to identify wear and damage before it becomes a brand standards issue, and establishing a standing order process for new site fit-outs that follows the same quality-controlled workflow as the original rollout.
If you have a multi-site programme to plan, brief us on your rollout and we will put together a programme proposal covering production, logistics and installation.
Frequently Asked Questions
How long does a multi-site rollout take?
It depends on the number of sites, the complexity of the installation and the access constraints at each location. A straightforward graphics-only rollout across 100 retail stores typically takes eight to twelve weeks from survey completion to final installation. Programmes involving signage, electrical work or landlord approvals take longer. We build detailed programme timelines during the planning phase so that expectations are set from the outset.
Can you manage a rollout across the whole of the UK?
Yes. We have installation capability covering England, Scotland and Wales through our own teams and vetted regional installation partners. Every installer on our programmes works to the same documented quality standards regardless of their geographic base.
What if some sites have different requirements?
Site-specific variation is the norm, not the exception. Our production and kitting process is designed to handle individual site specifications within a standard programme framework. Each site receives a bespoke kit based on its survey data, so variations in dimensions, substrates or element mix are managed at production stage rather than improvised on site.
Do you handle landlord and centre management approvals?
Yes. For retail estates and shopping centre locations, we manage the approval process with landlords and centre management teams, including submitting method statements, risk assessments and proof of insurance. Where advertisement consent is required, we handle the planning application process as well.
What happens if there is a problem during installation?
Our programme manager is the single escalation point. Any on-site issue access denied, surface condition not as surveyed, damaged materials is reported immediately and resolved centrally. We carry contingency stock for critical items and can dispatch replacement materials on a next-day basis.
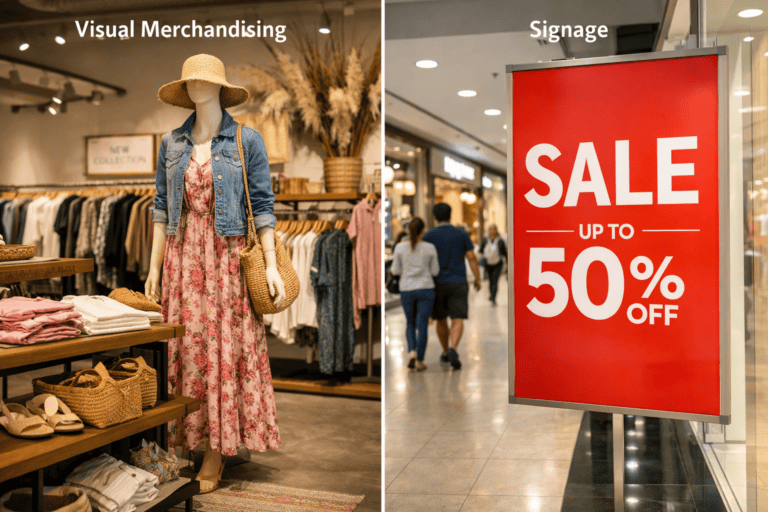
Can you also handle POS and display deployment as part of the rollout?
Yes. We produce and deploy POS display units as part of integrated rollout programmes. Displays are kitted alongside graphics and signage materials and distributed to sites as a single coordinated delivery.